Showing posts with label dessert. Show all posts

Thursday, May 2, 2013

Blackberry Beggar's Purse

My husband loves blackberries, so I picked some up to make him an anniversary dessert (we're doing our real anniversary celebration when we go to New York City the first week of June). Of course, on our actual anniversary, he suggested that we go out for pizza, so I made this the day after (last night). I had some puff pastry in the freezer. I don't remember why I bought it, but I figured blackberries and puff pastry can't be wrong. Years ago, there was a restaurant here that served a dark chocolate-cherry-walnut beggar's purse, which gave me the idea for what to do with these blackberries and puff pastry.

Blackberry Beggar's Purse
1/3 sheet frozen puff pastry
12 oz fresh blackberries, rinsed and dried
2-6 t sugar (depending on the sweetness of the berries and your taste)
gelato or whipped cream for serving (I went with Talenti Sicilian Pistachio YUM)

Thaw the puff pastry according to package directions. Preheat oven to 375°F. Cut the third of a sheet of puff pastry in two and roll each on a lightly floured surface into a 7- or 8-inch square. Place the puff pastry squares on a parchment-lined baking sheet (this I did not do, and transferring the filled sheets from the counter to the baking sheet was not very fun). Pile about half of the blackberries in the middle of each square (I saved a few berries for garnish) and sprinkle with sugar.
Don't do this. Put the pastry on the baking sheet first!
Fold the corners of the pastry in to the middle and pinch together. Use a little water if the corners don't stick together, or use egg wash (that seemed like a waste of an egg, but you could brush the pastry for a nice shine, too).
That one edge looks ragged because it was the edge of the puff pastry.
Bake for 25-30 minutes, until the pastry is golden. Serve with a scoop of gelato or a dollop of whipped cream and some fresh berries.

Makes 2 purses.

Tuesday, December 13, 2011

"Norwegian" Apple Pie

I found this pie crust recipe that calls for vodka, which sounded really interesting to me, especially after reading the theory behind it - vodka evaporates, so the crust is supposed to turn out super-flaky. The desire to make a caramel apple pie came to me a few weeks ago, until I read a post on Something Awful in which the Norwegian goat's milk cheese, gjetost, was used. I just happened to have a block of gjetost in the fridge, so I looked up recipes for gjetost apple pie and found one involving both sour cream and cardamom (two of my favorite edibles). Of course, I left out the cinnamon. :D

Start with the filling, since I think it's better after marinating for a while in the fridge. I used Honeycrisp apples because again, those were on-hand. In a large bowl, stir together 2 tablespoons of sour cream, 1 tablespoon of lemon juice, 1/2 cup of sugar (or evaporated cane juice), 1/2 teaspoon of cardamom, a pinch of Kosher salt, and 2 tablespoons of all-purpose flour.


Next, peel and quarter your apples, remove the cores and cut them into about 1/2" slices. My three apples weighed just over 1.5 pounds, which is enough for a deep-dish pie. Use less if you're using a regular pie tin. Then toss the apple slices in the sour cream mixture, cover, and refrigerate for at least 2 hours (that's all the time I had, but more would probably be better).


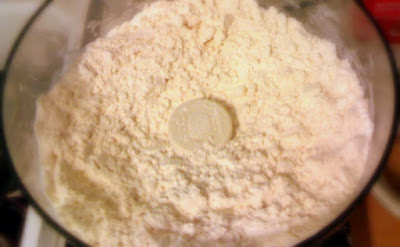
Time for the crust, which I'm doing in the food processor. Cut up 3 sticks of butter (I, of course, use salted butter) into small cubes, then place in the freezer for about 10 minutes. If you're making the crust by hand, put the cubes back into the refrigerator. Get out the food processor (or a large bowl) and add 4.5 cups of flour and 1/2 a tablespoon of Kosher salt. Give it a quick whir (or whisk). Add in the butter cubes and pulse (or rub or cut) until the mixture resembles course crumb. Sprinkle 1.5 tablespoons of vodka and 1/2 cup of water over the flour/butter and pulse (or stir) just until the dough holds together. Pour the dough onto your work surface and form it into a block, then wrap it in cling-film and let it rest there for 1 hour.



After 1 hour, roll out half of the dough on a floured surface into a 10" circle (leave the other half on the counter until it's time to cover the pie). Lightly press the dough into your tin. I overlapped the rim just a bit since I wasn't using a proper pie tin and I wanted the side to stay in place during blind baking. Trim the excess dough (I left it a bit rustic because that's just how I am). Turn your oven to 300°F and then put the tin in the freezer for 15-20 minutes.

Take the tin out of the freezer and cover the crust with parchment or aluminum foil. Fill the lined crust with dried beans, rice, or pie weights. Bake for 30 to 40 minutes, or until the crust is cooked but not browned. Remove the lining and weights and bake for 5 to 7 minutes, then remove to a wire rack to cool. Turn the oven up to 350°F so it can preheat while the bottom crust cools.


Shred 2 to 4 oz of gjetost, depending on your taste. Once the bottom pie crust has cooled, sprinkle half the cheese over it, then spoon in the apples after giving them a final toss in the sour cream mixture. Sprinkle the rest of the cheese on top of the apples.


Roll out the remaining half of dough into another 10" circle. I have another of the tins I used for the pie, so I used it as a guide for trimming. Lay the upper crust over the pie, pressing it gently into the inside rim of the bottom crust. Brush with egg wash (1 egg beaten with about tablespoon of water). Cut fun shapes out of the dough scraps and brush both sides with the egg wash before gluing to the top crust. Make slits or a small hole in the top crust to let out the steam.


Bake at 350°F for 35 to 45 minutes until the crust is golden and the filling is bubbly. Let the pie cool for at least 20 minutes. Remember to take a picture before you cut it. Oops! Serve slightly warm so the cheese is still melty (we took it over to my mother-in-law's house and set it on top of the warm oven).


Note: the apples still had a slight crunch, so if you don't like that sort of thing, either let the apples sit in the liquid for longer and/or slice them thinner.

Another note: don't use a cake tin if you can help it - getting that first slice out is ridiculously difficult. I just don't have a deep-dish pie tin (yet!).

Tuesday, December 6, 2011

Whoopie Pie Redux

Turned out I had all this frosting left over from the last batch of whoopie pies (don't fret, in that post, I gave measurements for 1/2 of what I actually made). So I thought I'd give it another go, since the red velvet pies were very popular around here. This time, I got a box of devil's food cake mix and different shortening. I also followed the recipe (gasp!) and used the correct mixer attachment, with good results.
Generic cake mix is the best; I fell for the butter-flavor shortening, but it's a fancy health-food brand, so it must be okay
This is dough, not batter like last time
Dry dough easily comes out of the spoon
I rolled it into balls... because I like balls
So the parchment trick wasn't too good this time since these needed to cool before they really set
Done

Thursday, December 1, 2011

Red Velvet Whoopie Pies

What to do with a box of red velvet cake mix? Make a cake? LOL no; too easy. Cookies? I don't know, kind of boring. Whoopie pies? YES!

I found a recipe online calling for only cake mix, shortening, and eggs. The cookies looked nicer (more like Oreo Cakester cookies) than other recipes calling for a more cakey batter. I decided to add some cocoa powder since I like super-cocoa flavor.
I mixed together 1 box of red velvet cake mix, 1 tablespoon of cocoa powder, 1/2 cup plus 2 tablespoons of shortening, and 2 eggs. The batter was rather thick and I happened to have buttermilk in the fridge, so I mixed a couple of tablespoons into the batter. Note: the little white dots are bits of my fancy non-hydrogenated shortening...
Scoop by tablespoon and attempt to drop onto a parchment-lined baking sheet. My batter wouldn't drop on its own, so I had to help it. Thus, they came out a little ugly. Perhaps an oiled tablespoon would correct that.
What I did here was drop the batter onto a sheet of parchment while I had one batch in the oven to at 375°F for 9 minutes, then I just changed out the parchment.
Now for the filling. What's better with red velvet cake than cream cheese frosting? White chocolate cream cheese frosting! Melt 3 oz of white chocolate and allow to cool a bit. Beat on high 4 oz of cream cheese, 2 tablespoons of butter, and 1/2 teaspoon of vanilla extract. Add in the white chocolate and beat some more before slowly beating in 1 cup of confectioner's sugar.
I forgot to picture the vanilla.
Put the frosting in a piping bag, or in my case, a ziplock with a corner cut off, and pipe the frosting onto the bottom of one cookie, then top with another. Thanks to the white chocolate, the frosting stiffens up with time, so even though they are really messy to eat right away, after a few hours they're totally manageable.
They were perfect. Perfect, I tell you!

Tuesday, November 22, 2011

Persimmon Upside-Down Cake

This fall I've been totally persimmon crazy. My fuyu persimmons have been ripening and they're finally pretty soft. I was thinking about what kinds of things I could do with them - jam, bread, pie... cake! For a while I was thinking Tarte Tatin, but I ended up deciding to do something a little different. I lucked out when I came across a recipe from Emeril Lagasse for Pineapple Upside Down Cake. I don't usually go for Emeril recipes, but this one was done in a cast-iron skillet, which I thought was really cool, so I could get that Tarte Tatin feeling with a cake. Warning: this cake is very sweet; whipped cream or crème fraiche will help cut the sweetness.

Start with slicing the persimmons into pretty rounds about 1/2-inch thick. I love the star pattern inside the fuyus. Also let the butter soften. Coarsely chop the persimmon butts to purée and add to the cake batter. Emeril's recipe calls for 1 cup of buttermilk, so I puréed the leftover persimmon with buttermilk to make 1 cup.


Next make what will become the top of the cake. In an oven-proof skillet over medium heat, melt 4 tablespoons of butter. Then add 3/4 cup of light brown sugar, increase the heat to medium-high, and cook until bubbly. Arrange the persimmon slices in the bubbling goo and cook for about 2 minutes. Flip the persimmon slices and remove the skillet from the heat.


Now start on the cake batter. Stir together 1 cup of cake flour, 1 cup of all-purpose flour, 1 teaspoon of baking powder, 1 teaspoon of baking soda, and 1/4 teaspoon of salt.
Cream together 1/2 cup of butter and 1 cup of granulated sugar until light and fluffy. Add 2 eggs, one at a time, mixing until incorporated.
Add the flour mixture and persimmon purée in 3 alternating batches, mixing at low speed until combined. Scrape the sides of the bowl occasionally.
Once the batter is finished, scrape the sides of the bowl with a spatula once more to make sure everything is combined, then carefully pour over the persimmon slices in the skillet.
Put the skillet in the middle of a 375°F oven and bake until the top is golden brown and a toothpick comes out clean, about 30-35 minutes. Remove the entire skillet to a rack and cool for 5 minutes.
Very carefully flip the cake onto a plate.
Now make some whipped cream. A trick I learned doing pastry at a restaurant is to whip the cream in a frozen metal bowl and only add flavors once the whipping is almost finished. Also, make sure the whipping cream is very cold. These measures prevent "weeping," that is, liquid seeping out from the whipped cream after it sits for a while. Whip the cream on high speed until soft peaks form, then add brown sugar to taste (I don't like mine very sweet). Whip it some more just until the peaks don't collapse. Stop there before you start getting butter!